Travertine, an exquisite natural stone, is a unique form of limestone that emerges from the mineral deposits found around hot springs and in limestone caves. This fascinating formation process lends travertine its distinctive character, highlighted by voids and varied textures that infuse depth and interest into any design. Frequently utilised for flooring and wall cladding, travertine radiates a classic elegance that appeals to both traditional and contemporary styles. The remarkable durability of travertine makes it an outstanding selection for high-traffic areas in both residences and commercial environments, ensuring longevity and sustained beauty over time.
The allure of travertine transcends mere aesthetics; it also boasts significant functional benefits. Available in a spectrum of hues—from warm creams to rich earthy browns—travertine can harmoniously complement a variety of colour schemes and design styles. Its capacity to retain warmth makes it particularly advantageous for underfloor heating systems, creating a cosy atmosphere during the chilly months. Additionally, the stone’s porous structure promotes excellent water drainage, rendering it a preferred option for outdoor settings such as patios and pool areas. As homeowners increasingly gravitate towards natural materials in their designs, the versatility and charm of travertine continue to rise in popularity.
When contemplating travertine for your flooring or surfaces, familiarising yourself with the diverse types and finishes available is essential. Travertine comes in several finishes, including honed, polished, and tumbled, each offering distinct aesthetics and varying maintenance needs. A honed finish presents a matte appearance that provides understated elegance and is less slippery, making it suitable for indoor spaces like kitchens and bathrooms. This finish maintains a natural look while effectively concealing scratches and stains, a crucial feature for high-traffic environments.
Conversely, polished travertine features a high-gloss sheen that can transform any room into a luxurious retreat. However, this finish demands more frequent maintenance, as it tends to highlight water spots and fingerprints. Although polished travertine introduces sophistication, it may not be ideal for households with children or pets. Tumbled travertine offers a rustic, textured surface that is best suited for outdoor spaces or homeowners desiring a more natural, weathered appearance. This porous texture not only enhances aesthetic appeal but also enhances slip resistance.
Each finish type necessitates a specific cleaning and maintenance regimen, which is vital for preserving the stone’s integrity. Recognising these distinctions is crucial for homeowners to choose the appropriate travertine that aligns with their lifestyle and design preferences. Ultimately, the selected finish will not only affect the appearance of your space but also influence your approach to cleaning travertine tile and its ongoing care.
The charm of travertine lies in its multitude of benefits, making it a highly coveted material in both residential and commercial projects. One of the most significant advantages of travertine is its inherent beauty. Each tile showcases unique patterns and colours that can elevate the design of any space, lending a luxurious atmosphere. Its timeless appeal ensures that travertine remains stylish, irrespective of evolving design trends, making it a wise investment for any property.
In addition to its visual allure, travertine is celebrated for its exceptional durability. It can endure considerable foot traffic without losing its charm, making it particularly suitable for bustling households or commercial establishments. Unlike synthetic alternatives, travertine is heat resistant, allowing it to remain pleasantly cool underfoot during warmer months, a feature especially appreciated in the UK’s temperate climate. This quality is particularly advantageous in outdoor settings like patios, where natural stone seamlessly integrates with the surrounding landscape.
Furthermore, travertine is an environmentally friendly choice. As a natural stone, it avoids the energy-intensive manufacturing processes associated with many synthetic materials. Its longevity further minimises environmental impact, as fewer resources are required for replacements. Moreover, when adequately sealed and maintained, travertine can resist stains and moisture, leading to reduced frequency of replacements and cleaning products, thereby promoting sustainability in home upkeep.
Lastly, travertine can significantly enhance the value of a property. Its lavish appearance and durability appeal to potential buyers, making it an excellent choice for homeowners aiming to improve their property’s marketability. By investing in premium travertine solutions, you can create spaces that are not only visually stunning but also practically enduring, ensuring your investment yields beautiful returns.
The process of installing travertine is a critical phase in ensuring that this stunning natural stone performs optimally and retains its beauty for many years. Proper installation commences with meticulous surface preparation. The foundation must be solid, clean, and dry to avert shifting or cracking after the tiles are laid. Evaluating the subfloor and executing any necessary repairs before installation is crucial. This groundwork lays the foundation for a flawless and enduring finish.
After preparing the surface, selecting the appropriate adhesives for travertine is essential. Not all adhesives are suitable for natural stone; therefore, it is prudent to use a high-quality thin-set mortar specifically designed for natural stone. The application of the adhesive should be even, with careful attention to the spacing between tiles. Utilising spacers can help maintain uniform gaps for grout. While laying the tiles, it is vital to regularly check for levelness and alignment to avoid any visible discrepancies once the installation is complete.
Another crucial step that should not be overlooked is sealing the travertine post-installation. Since travertine is porous, it is vulnerable to stains and moisture penetration. Applying the appropriate sealant protects the stone from these risks, extending its lifespan and maintaining its aesthetic appeal. It is advisable to wait at least 48 hours after installation before applying the sealant, allowing the adhesive to cure correctly. Regular maintenance of the sealant, typically every 12 to 18 months, ensures that your travertine remains in pristine condition, making the initial installation efforts worthwhile.
Comprehending the intricacies of travertine installation enables homeowners to appreciate the importance of each step. When executed correctly, the installation will not only enhance the beauty of the space but also contribute to the longevity and functionality of the tiles. Whether in an opulent living room or a tranquil outdoor patio, the correct installation will yield breathtaking results.
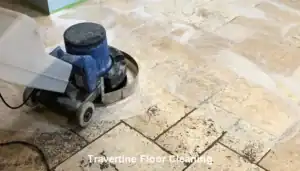
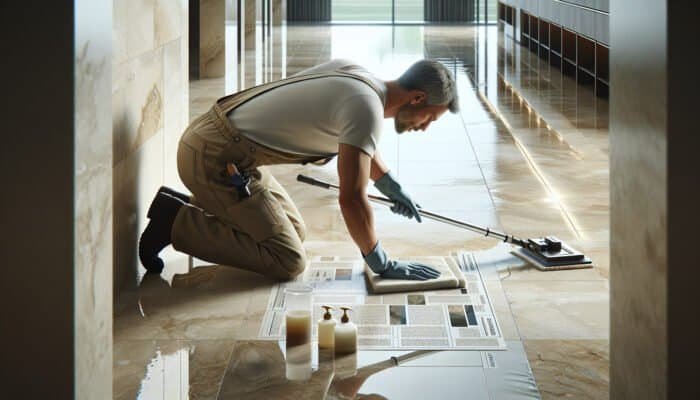
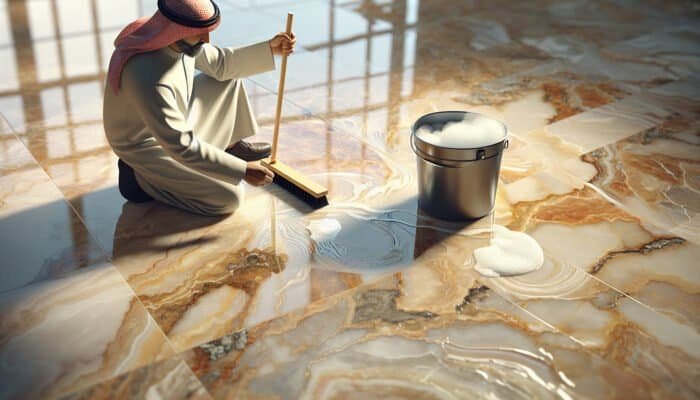
Before embarking on the task of cleaning travertine tile, ensuring you have the appropriate supplies is paramount. Begin with a soft broom to sweep away dirt and debris without damaging the delicate surface of the travertine. For a more thorough cleaning, a pH-neutral cleaner is essential. This type of cleaner is formulated to avoid damaging the stone or stripping away its natural finish, making it the safest option for regular use.
Next, gather soft cloths or mop heads, which will be used to apply the cleaning solution and wipe down the surfaces. Steer clear of abrasive materials or scrubbing brushes, as these can lead to unsightly scratches and diminish the stone’s lustre. Additionally, having a bucket readily available will facilitate the mixing of your cleaning solution, ensuring you have everything you need within arm’s reach. This level of organisation streamlines the cleaning process and allows for a more efficient workflow.
Consider investing in a specialised stone care product that can offer additional benefits, such as enhanced stain resistance or shine. While these may not be necessary for routine cleaning, they can be beneficial for periodic maintenance. With the right tools at your disposal, you will feel prepared and empowered to tackle the cleaning task with confidence, ensuring your travertine remains stunning and well-maintained.

Before initiating the cleaning process, it’s vital to prepare the area adequately. Start by removing any furniture, rugs, or decorative items from the travertine surface. This step not only provides full access to the area but also shields your cherished belongings from potential damage during the cleaning process. Dust and debris tend to accumulate beneath furniture, so clearing the space allows for a comprehensive cleaning, ensuring every inch of your travertine receives attention.
Once the area is cleared, take a moment to inspect the travertine tiles for any visible dirt or debris. This attention to detail ensures that nothing is left behind that could scratch the surface during cleaning. Additionally, consider the layout of the room and how the cleaning will progress. Working in small sections will help manage the cleaning process, making it easier to track your progress and uphold efficiency.
Protecting adjacent areas is another crucial consideration. Use painter’s tape to mask off edges around baseboards, door frames, and any fixtures that could be exposed to water or cleaning solutions. Plastic sheeting can also be employed to shield walls or fixtures from splashes. This practice not only keeps your space tidy but also prevents potential damage, allowing you to focus on achieving a pristine finish on your travertine.
By adequately preparing the area, you set yourself up for success. A well-organised and clean workspace facilitates effective cleaning, ensuring that your travertine tile shines brilliantly after your efforts.
As you prepare to clean your travertine tile, taking proactive measures to protect the surrounding areas is vital. Cleaning solutions and excess water can easily splash onto walls, furniture, and other surfaces, leading to unintended damage or unsightly marks. To safeguard these areas, start by using painter’s tape to secure edges around baseboards, door frames, and any fixtures that could be affected. This simple precaution can save you from the hassle of post-cleaning cleanup.
Additionally, consider laying down plastic sheeting or drop cloths over furniture or items that cannot be moved. This creates a barrier that will catch any water or cleaning solution that escapes your designated cleaning area. By implementing this strategy, you’ll not only protect your belongings but also streamline the cleaning process, making it less stressful and more efficient.
Be cautious when applying cleaners to your travertine tile. Use a spray bottle or a damp cloth to control the amount of solution applied, minimising the risk of overspray. If you are using mops, ensure they are wrung out thoroughly before applying them to the surface. Keeping water usage minimal will help reduce the risk of water damage to adjacent areas while ensuring your travertine remains intact.
Ultimately, taking the time to protect surrounding areas enhances your cleaning experience, providing peace of mind and allowing you to focus on achieving a spotless finish on your travertine. Proper preparation guarantees that your entire cleaning process is efficient and hassle-free.
Before commencing the cleaning process, it’s prudent to undertake a meticulous inspection of your travertine tiles for any signs of damage. Look for cracks, chips, or uneven areas that may require special attention. Damaged tiles can complicate the cleaning process, so addressing these concerns beforehand is crucial. Identifying potential problems early on can save you from costly repairs in the future.
If you uncover any cracks or chips, consider documenting these findings. Taking photographs can assist you in tracking the damage and provide a reference point for future maintenance or repairs. Depending on the severity of the damage, you may need to consult a professional for repairs or restoration. Identifying these issues before cleaning allows you to adjust your cleaning strategy, ensuring that you don’t inadvertently worsen existing problems during the process.
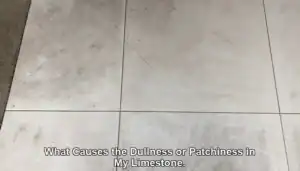
Furthermore, when examining your travertine, check for discolouration or areas that appear dull compared to the rest of the surface. These could indicate staining or the need for deep cleaning. If you notice significant stains, it may be beneficial to consult a professional who can recommend the best cleaning solutions or poultice treatments designed explicitly for travertine.
By checking for damages before cleaning, you not only preserve the integrity of your travertine but also ensure that your cleaning efforts yield the best possible results. This proactive step is essential for maintaining the beauty and longevity of your natural stone.
With your cleaning area prepped and your supplies gathered, it’s time to concoct the cleaning solution. The cornerstone of successfully cleaning travertine tile lies in using a pH-neutral cleaner, specifically formulated for natural stone. This ensures that you’re not inadvertently damaging the travertine’s surface. Follow the manufacturer’s instructions closely, as the proper dilution ratio is crucial for effective cleaning without inflicting harm.
Begin by filling your bucket with warm water, as this aids in activating the cleaner and can enhance its effectiveness. Gradually mix in the pH-neutral cleaner, stirring gently to ensure an even distribution throughout the solution. Avoid using excessive amounts of cleaner, as a little can go a long way. Overuse can leave a residue, resulting in a dull or streaky appearance post-cleaning.
Once you have prepared the solution, it’s advisable to conduct a spot test on a small, inconspicuous area of the travertine before applying the cleaner to the entire surface. This test allows you to verify that the solution does not adversely affect the stone’s finish. If you’re satisfied with the results after a few minutes, you can confidently proceed with cleaning the whole area.
Having the proper cleaning solution prepared sets the stage for a practical cleaning session. With a pH-neutral cleaner designed explicitly for travertine, you can ensure that your beautiful stone remains intact while achieving the level of cleanliness you desire.
Daily maintenance is crucial for preserving the beauty and longevity of your travertine tiles. Regularly sweeping or dusting the surfaces helps prevent dirt and grit from accumulating, which can lead to scratches and dullness over time. A soft broom is ideal for this task, as it won’t damage the delicate surface of the travertine. Aim to sweep at least a few times a week, especially in high-traffic areas, to keep your floors looking pristine.
In addition to sweeping, consider utilising a microfibre dust mop. This tool is excellent for trapping dust and particles, preventing them from being dragged around and potentially scratching the tile. Regular dusting not only contributes to the appearance of your travertine but also creates a healthier indoor environment by reducing allergens and dust particles in your home.
Establishing a cleaning routine that suits your lifestyle is essential. Setting a specific day of the week for deeper cleaning, combined with daily sweeping or dusting, can help maintain your travertine’s impeccable appearance. Consistency is key; the more regularly you maintain your travertine, the less effort you will need to exert during more thorough cleanings.
Taking these steps will safeguard your investment in travertine, keeping it beautiful and functional for years to come. The effortless elegance of your travertine can be preserved through diligent daily maintenance and care, enhancing your home’s overall aesthetic.
Spot cleaning is an essential part of maintaining your travertine tile, particularly when it comes to preventing stains and preserving its natural beauty. Promptly addressing spills is crucial, as certain liquids, especially acidic substances like wine, vinegar, or citrus juices, can lead to discolouration and damage the stone. To facilitate effective spot cleaning, always keep a damp cloth or sponge accessible to tackle spills as soon as they occur.
For general stains, dampening a soft cloth with warm water and gently blotting the area is often sufficient. Avoid scrubbing, as this can lead to scratches and further damage. For tougher stains, use a pH-neutral cleaner specifically designed for natural stone, applying it directly to the stained area and allowing it to sit for a few minutes before gently wiping it away. This approach permits the cleaner to penetrate the stain without harming the travertine.
Establishing a habit of spot cleaning whenever spills occur can drastically diminish the need for extensive cleaning sessions later on. Additionally, educating family members about the importance of immediate spill management will help maintain the pristine condition of your travertine. With regular attention, your travertine can remain beautiful and stain-free, enhancing the overall appeal of your home.
To extend the lifespan of your travertine floors, strategically placing rugs and mats in key areas can be highly effective. Entryways are particularly important, as they serve as the primary access points for dirt, moisture, and grit. Placing high-quality mats at these locations helps capture debris before it can come into contact with your travertine, significantly reducing the amount of dirt tracked across the surface.
In addition to entryways, consider using area rugs in high-traffic zones, such as living rooms or kitchens. Select rugs crafted from natural materials that are less likely to slip and slide, ensuring safety while also enhancing the overall aesthetic appeal of your space. Regular cleaning of rugs is essential to prevent the buildup of dirt, which could otherwise transfer to the travertine.
It’s also beneficial to rotate your rugs periodically to allow for even wear and to prevent any potential fading of the travertine underneath. This simple yet effective strategy not only protects your floors but can also add warmth and character to your home. By integrating rugs and mats into your maintenance routine, you’ll be taking an extra step towards preserving the exquisite beauty of your travertine tiles.
Choosing the appropriate cleaner is foundational to the effective deep cleaning of your travertine tiles. For natural stone surfaces like travertine, it’s vital to opt for a pH-neutral cleaner specifically designed for stone. These formulations are gentle on the surface while still providing the necessary cleaning power to eliminate stubborn dirt and grime. Avoid acidic or abrasive cleaners, as these can etch and discolour the stone, leading to irreversible damage.
When shopping for cleaners, look for products that contain natural ingredients and are free from harsh chemicals. The right cleaner should effectively break down dirt without compromising the integrity of the stone. Reading reviews or seeking recommendations from professionals can help guide your choice. If you’re unsure about which product to select, consult with a local stone care expert or retailer who can provide tailored advice based on your specific tile type and condition.
Additionally, consider the size of your cleaning task when selecting a cleaner. Larger areas may require a more concentrated solution, while smaller sections can benefit from ready-to-use sprays. Prepare for your cleaning session by having everything on hand, allowing you to tackle your travertine tiles with efficiency and ease. The right cleaning product will not only enhance the effectiveness of your efforts but will also promote the longevity and beauty of your travertine surface.
Once you’ve selected the perfect cleaner for your travertine, it’s time to put it into action. Start by diluting the cleaner according to the manufacturer’s instructions and ensure you’re working with a soft mop or cloth to avoid scratching the delicate surface. It’s advisable to tackle the cleaning process in small sections, allowing you to maintain control and ensure thorough coverage without the cleaner drying on the surface before you can wipe it away.
Apply the cleaner evenly across the tiles, using a gentle back-and-forth motion. Avoid excessive scrubbing, as this can lead to scratches and damage. Allow the cleaner to sit for the recommended duration to enable it to penetrate and break down dirt, stains, and grime effectively. While you wait, take this opportunity to inspect other areas of your travertine for further maintenance needs.
After allowing the cleaner to work its magic, proceed to rinse the area thoroughly with clean water. It’s essential to remove all cleaner residues to prevent streaks or spots from forming. Using a separate mop or cloth dampened with clean water, go over the recently cleaned area to ensure the removal of any remaining product. Promptly dry the surface with a soft towel to prevent water spots and mineral deposits from forming, ensuring your travertine tiles retain their pristine appearance.
Rinsing and drying your travertine tiles after cleaning is a critical step in the process, ensuring that your efforts yield the best possible results. Once you have applied the cleaner and allowed it to work on the dirt and stains, it’s crucial to rinse thoroughly with clean water. This step eliminates any residual cleaning solution that could leave streaks or dullness on your beautiful tiles.
Prepare another bucket of warm water, or use a separate clean mop to rinse the tiles. Begin from one corner of the room, working your way systematically across the area. This method not only ensures thorough rinsing but also helps you monitor your progress, avoiding any spots that may be overlooked. Pay particular attention to grout lines, where dirt can accumulate and cleaning solutions may linger.
After rinsing, drying the surface is equally important. Utilising a soft, absorbent towel or cloth, gently dry each tile to prevent water spots and mineral deposits from forming. Excess moisture on travertine can lead to unsightly spots and may even encourage mould growth in damp conditions. By taking the time to dry your tiles properly, you ensure a clean, gleaming finish that showcases the natural beauty of your travertine.
Establishing a thorough rinsing and drying routine during your cleaning process will significantly enhance the longevity and appearance of your travertine tiles. This vital step is your safeguard against future cleaning challenges, preserving the stone’s elegance and integrity for years to come.
Successfully removing stains from travertine tiles begins with accurately identifying the type of stain you’re dealing with. Travertine can be susceptible to various stains, including oil-based, organic, and inorganic stains. Oil-based stains, often originating from cooking oils, cosmetics, or greasy substances, require a different approach compared to organic stains, which are typically caused by food, beverages, or plant materials. Inorganic stains, such as rust or hard water deposits, necessitate specialised treatment methods.
Understanding the differences between these stains helps you select the appropriate cleaning or removal technique. For instance, oil-based stains may require a poultice made from a suitable absorbent material, while organic stains can often be removed with a pH-neutral cleaner and some elbow grease. Inorganic stains, particularly rust, may need a specific rust remover designed for natural stone.
Conducting a simple spot test can also be beneficial. For example, dampen a cloth with the cleaner you intend to use and apply it to a small, inconspicuous area of the stain. Allow it to sit for a few minutes; if the stain lightens or disappears, you’ve likely identified the correct cleaning approach. However, if the stain persists, consider consulting a professional for advice on specialised treatments for stubborn stains.
By accurately identifying the types of stains present on your travertine, you’ll be equipped to tackle them effectively. This proactive approach ensures that you don’t inadvertently worsen the situation and preserves the integrity of your beautiful stone.
When facing deeper stains on travertine tiles, applying a poultice can be an effective solution. A poultice is a paste-like substance that can draw out stains from the stone without causing damage. To create a poultice, mix a cleaning agent with an absorbent material, such as baking soda or diatomaceous earth, forming a paste with a consistency similar to peanut butter. The absorbent component is crucial, as it will assist in drawing out the stain from the travertine.
To use the poultice, generously apply it over the stained area, ensuring complete coverage. Use a plastic scraper or a soft cloth to ensure even application, then cover the poultice with plastic wrap. This step helps prevent the poultice from drying out too quickly, allowing it to penetrate the stain effectively. Leave the poultice on for 24 hours to give it ample time to draw out the stain.
After the waiting period, carefully remove the poultice using a damp cloth and rinse the area with clean water. Observe the results; you may need to repeat the process if the stain persists. For particularly stubborn stains, multiple applications may be necessary to achieve the desired outcome.
Using poultices is a gentle yet powerful method for dealing with deep stains on travertine. This approach allows you to preserve the integrity of your stone while effectively addressing unsightly blemishes that could detract from its beauty.
Preventing stains on your travertine tiles is far easier than addressing them after they occur. One of the most effective strategies is to seal your travertine surfaces with a high-quality stone sealer regularly. Sealing creates a protective barrier that helps repel water and stains, making it easier to clean up spills before they can penetrate the stone. Depending on the type of sealer used, reapplication may be necessary every 12 to 18 months, but this proactive measure can save you significant time and effort in the long run.
In addition to sealing, it’s essential to educate household members about the importance of managing spills promptly. Encourage everyone to wipe up messes immediately, particularly in areas like kitchens or dining rooms where food and beverages are prevalent. Keeping a soft cloth on hand for quick clean-ups can significantly reduce the risk of stains taking hold.
Furthermore, consider implementing a no-shoes policy in areas with travertine flooring. Shoes can carry dirt and abrasive materials that contribute to scratches and stains. By promoting a clean and careful environment, you’ll be taking essential steps toward protecting your travertine tiles from future damage.
Ultimately, a combination of regular sealing, prompt spill management, and protective measures will help keep your travertine looking beautiful and pristine for years to come, preserving its natural elegance and functionality.
Restoring travertine tiles begins with a comprehensive assessment of any damage present. Inspect the surfaces closely for scratches, etching, or discolouration. Pay particular attention to high-traffic areas where wear and tear are more likely to occur. Identifying the extent of the damage will guide you in determining the level of restoration needed. For minor issues, simple cleaning and sealing may suffice, while more significant problems might require professional intervention.
When assessing scratches, consider their depth and visibility. Light surface scratches can often be polished out using a fine-grit honing pad or a specialised polishing compound designed for natural stone. However, deeper scratches may require professional refinishing to restore the surface to its original beauty. Similarly, etching caused by acidic substances may need the application of a honing powder or compound to eliminate dulled areas and restore shine.
Discolouration can also be a crucial factor to assess. If certain areas have become dull or stained, it may be necessary to implement a deep cleaning regimen or consider using poultices for stain removal. Understanding the specific type of damage allows you to formulate an effective restoration plan tailored to your travertine’s needs, ensuring that your investment is protected.
By conducting a meticulous assessment of your travertine, you can proactively address concerns, preserving the stone’s integrity and beauty. This fundamental step is crucial for achieving successful restoration and maintaining the elegance of your travertine surfaces.
Once you’ve assessed the damage to your travertine tiles, the next step in the restoration process often involves polishing and honing. These techniques are vital for restoring the original shine and lustre of your travertine. Polishing refers to refining the surface to create a glossy finish, while honing involves grinding the stone to produce a smooth, matte appearance. Depending on your desired outcome, you may choose to apply one or both methods.
To begin honing, select a honing pad or compound suitable for travertine. Start with a coarse grit to eliminate surface imperfections or scratches, gradually transitioning to finer grits to achieve a polished finish. Use a low-speed buffer or rotary machine to facilitate the process, ensuring consistent pressure and movement across the tile surface. This will help remove scratches while preserving the stone’s natural texture.
Once honing is complete, you may opt to polish the surface for added shine. Using a polishing compound specifically designed for natural stone, apply it with a soft cloth or buffer. Work in small sections, applying even pressure to create a lustrous finish. Remember that the polishing process can generate excess dust, so ensure your workspace is adequately prepared to minimise mess.
The combination of honing and polishing not only enhances the aesthetic appeal of your travertine but also provides an extra layer of protection against future stains and scratches. By investing time in these restoration techniques, you can revitalise your travertine surfaces, allowing them to shine as they once did and enhancing the overall beauty of your home.
After completing the honing and polishing processes, it’s imperative to perform a thorough cleaning of your travertine tiles before applying a new sealant. This step ensures that any dust, residue, or particles from the restoration process are removed, allowing the sealant to adhere properly to the stone. Use a pH-neutral cleaner, diluted according to the manufacturer’s instructions, and gently clean the surface with a soft mop or cloth.
Once the travertine is clean and dry, it’s time to apply a high-quality sealant specifically designed for natural stone. Sealing helps protect against stains and moisture penetration, maintaining the integrity and beauty of your travertine. Using a roller or brush, apply the sealant evenly across the surface, ensuring complete coverage. Pay extra attention to grout lines and edges, as these areas are more prone to damage.
Allow the sealant to cure according to the manufacturer’s recommendations, which may require several hours or even days. Avoid walking on the sealed tiles during this time to ensure optimal adhesion and effectiveness. Regularly checking the sealant and reapplying as needed—typically every 12 to 18 months—will ensure the longevity of your restoration efforts.
By prioritising both cleaning and sealing, you protect your travertine surfaces from future damage while preserving their stunning appearance. This final step in the restoration process solidifies your commitment to maintaining the beauty and functionality of your travertine tiles.
To ensure the longevity and aesthetic appeal of your travertine tiles, addressing cracks and holes is essential. Minor cracks or chips can often be repaired using an appropriate travertine filler, which comes in various shades to match the colour of your tiles. Begin by thoroughly cleaning the damaged area to remove any debris or dust. This step is crucial for the filler to adhere effectively and ensure a clean repair.
After preparing the area, apply the travertine filler according to the manufacturer’s instructions. Use a putty knife or a similar tool to fill the crack, ensuring it is slightly overfilled to compensate for any shrinkage during the curing process. Smooth the surface of the filler to blend seamlessly with the surrounding tile. Allow the filler to cure completely as per the product recommendations, which may take several hours or even days.
Once cured, you may need to lightly sand the area with fine-grit sandpaper to achieve a smooth finish. If necessary, follow up with honing or polishing to restore the sheen of the repaired area, ensuring it matches the rest of your travertine surface.
By effectively repairing cracks and holes, you not only enhance the appearance of your travertine but also prevent further damage from occurring. This careful attention to detail will ensure that your travertine tiles remain stunning and functional for years to come.
It is advisable to clean travertine tiles at least once a week using a pH-neutral cleaner, while daily spot cleaning for spills is essential to prevent stains from setting in.
No, vinegar is acidic and can damage travertine surfaces by causing etching. Always use a pH-neutral cleaner explicitly formulated for natural stone.
For stubborn stains, apply a poultice made from an absorbent material and a compatible cleaning agent. Allow it to sit for 24 hours before removing, and repeat if necessary for best results.
Yes, sealing travertine is crucial to protect it from stains and moisture. Regular sealing every 12 to 18 months helps maintain its beauty and integrity.
Light scratches can often be polished out using a fine-grit honing pad. For deeper scratches, you may need to seek professional refinishing services.
No, steam cleaners can damage the surface of travertine by penetrating the stone and leading to cracks or discolouration. Stick to gentle cleaning methods to preserve the stone.
Regular cleaning, polishing, and sealing are vital to maintaining the shine of your travertine. Avoid using abrasive materials during cleaning to prevent dullness.
Avoid acidic or abrasive cleaners, along with harsh chemicals, as these can etch and damage the surface of travertine tiles, compromising their beauty.
Regularly sealing your travertine, managing spills immediately, and using rugs or mats in high-traffic areas can significantly reduce the risk of stains setting in.
While DIY installation is possible, it requires careful preparation and knowledge of proper techniques. For optimal results, consider hiring a professional installer.