Cleaning Red Quarry Tiles the Right Way offers a comprehensive guide to properly cleaning and restoring red quarry tiles, especially in older homes or heritage properties.
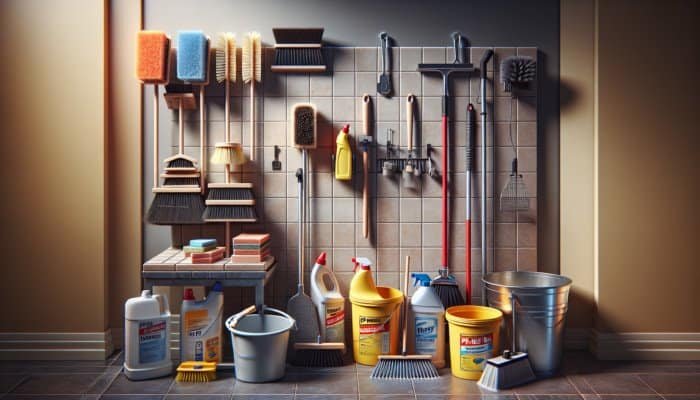
To learn how to clean red quarry tiles effectively, it’s essential to have the right cleaning supplies readily accessible. Begin assembling critical cleaning agents, including pH-neutral tile cleaners, a gentle broom, and a sturdy, stiff brush. These tools are designed to target various types of grime while ensuring no damage is inflicted on the tiles. Furthermore, incorporating buckets and a mop can simplify the application of your chosen cleaning solutions, making the process smoother and more efficient.
Equally important is the inclusion of personal protective equipment. Wearing gloves can protect your hands from harsh chemicals, while safety goggles shield your eyes from potential splashes. When selecting cleaning agents, prioritise biodegradable options that are both effective and gentle on your tiles. These environmentally responsible choices preserve the integrity of your tiles and positively impact your home’s ecosystem by reducing harmful chemical exposure.
Having all your supplies organised before you commence eliminates the risk of interruptions during your cleaning session, allowing you to maintain a steady workflow. By preparing meticulously, you create an ideal environment for a deep clean that returns the original beauty of your red quarry tiles.
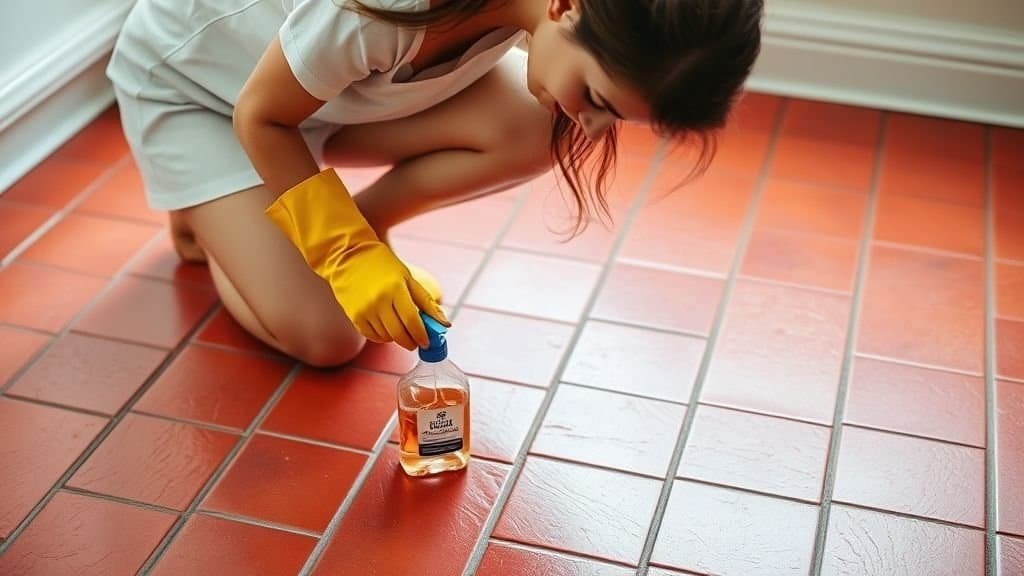
Cleaning often involves using potent chemicals that, while effective, can pose health risks if not handled properly. When embarking on cleaning red quarry tiles, wearing gloves and eye protection is imperative. These safety measures are essential, not merely for comfort but also to protect against potential chemical burns or skin irritation from contact with these cleaning solutions.
Adequate ventilation is another vital aspect of maintaining safety throughout the cleaning process. Open windows and doors facilitate air circulation, thereby reducing the concentration of any chemical fumes in the environment. If feasible, using an exhaust fan can significantly enhance airflow. Additionally, be vigilant about spills or messes, as slippery floors can lead to accidents and injuries.
Prioritising your safety protects your wellbeing and fosters a more efficient cleaning environment. A well-prepared and cautious approach allows you to concentrate fully on the task, without distractions or concerns.
Proper preparation for cleaning your red quarry tiles extends beyond merely gathering supplies; it necessitates thoroughly clearing the area. Start by removing any furniture, rugs, or obstructions that may hinder access to the tiles. This step provides you with complete visibility of your cleaning space and mitigates the risk of damage to your belongings during the cleaning process.
Consider the layout of your area carefully. For example, when cleaning tiles in a kitchen, ensure that all appliances are moved aside. Disconnecting items may require extra time, but it is crucial for achieving a comprehensive clean. Similarly, in high-traffic areas like hallways or entryways, remove shoes, coats, and other clutter to eliminate potential tripping hazards.
Once the area is decluttered, take a moment to assess the condition of the tiles. Identify any areas that appear dirty or stained, as this insight allows you to tailor your cleaning approach effectively. A clutter-free environment sets the stage for a successful cleaning session, enabling you to focus on restoring the stunning appearance of your red quarry tiles.
The first step in cleaning red quarry tiles is to sweep them thoroughly before engaging in more intensive cleaning techniques. Using a soft broom, gently remove any loose dirt, dust, and debris that may have settled on the surface over time. This initial step is crucial, establishing a clean foundation for deeper cleaning actions.
When selecting your broom, choose one with soft bristles to prevent scratching the tile surface. As you sweep, pay particular attention to corners and edges where dirt accumulates. It is advisable to use a dustpan to collect debris rather than sweeping it to another area, ensuring you are left with a clean surface to work on for the subsequent cleaning steps.
While sweeping may seem straightforward, it plays a vital role in preventing dust and dirt from spreading during subsequent cleaning phases. Starting with a clean base allows for a more effective application of cleaning solutions, ensuring the best possible results.
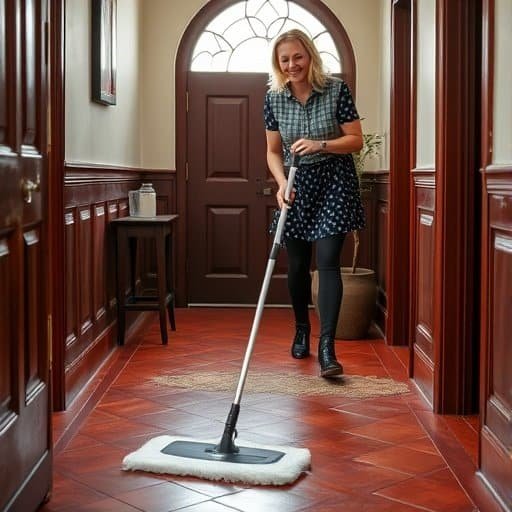
Once you’ve swept away any loose debris, the next step is to damp mop the tiles. This stage is essential in cleaning red quarry tiles, as it aids in lifting any remaining dirt that may be clinging to the tile surface. Using a clean mop and warm water, lightly dampen the tiles without soaking them, as excessive moisture can seep into grout lines and promote mould growth.
Mopping with water serves multiple purposes. It eliminates surface grime and prepares the tiles for the subsequent application of cleaning solutions. Using a clean mop head is vital to avoid reintroducing dirt during this step. If your tiles are particularly stained or have persistent marks, consider adding a few drops of a mild dish soap to the water for enhanced cleaning efficacy.
Ensure that you rinse your mop frequently to avoid the redistribution of dirt. After mopping, allow the tiles to air dry, setting the stage for the next phase, where you will employ more targeted cleaning solutions tailored to your specific needs.
Before fully committing to any cleaning agent, conducting a spot test is a crucial step in cleaning red quarry tiles. This precaution ensures that the cleaning solution you intend to use won’t damage the tiles or adversely alter their appearance. Choose a small, inconspicuous area of the tile to conduct your test.
Apply a small amount of the cleaning agent and allow it to sit for a few minutes. After the dwell time, gently wipe the area with a clean cloth and observe whether any discolouration or damage occurs. If the tiles remain unaffected, you can confidently proceed with the full application of your cleaning method.
If you are uncertain about which cleaner to use, consult product reviews or seek recommendations from professionals. Spot testing protects your investment in your home and instils confidence, enabling you to clean without worrying about potential damage.
Once you’ve applied your cleaning solution, it’s vital to rinse the tiles thoroughly. This step is essential in cleaning red quarry tiles, as it ensures that all remnants of cleaning agents are removed, preventing unsightly streaking and residue build-up. Work systematically across the tiles using a clean bucket of water and a mop or cloth to ensure complete coverage.
Be diligent about changing the water frequently to avoid redistributing dirt. Rinsing not only cleanses the surface but also helps to highlight any remaining stains that may require additional attention. After rinsing, allow the tiles to air dry or use a clean, dry cloth to wipe them down, ensuring a pristine finish.
A well-rinsed surface enhances the overall aesthetic appeal and prepares your tiles for subsequent steps, such as scrubbing and sealing. Paying attention to detail during this phase significantly contributes to the overall success of your cleaning efforts.
Drying is a frequently overlooked yet critical aspect of cleaning red quarry tiles. After mopping and rinsing, allowing the tiles to dry adequately prevents water spots and potential mould growth. If you air dry, ensure the room is well-ventilated; this accelerates the drying process and promotes a healthier indoor environment.
For faster results, use a clean, dry cloth to wipe each tile, taking care to avoid causing any scratches. This manual approach ensures that all moisture is removed, particularly from grout lines, where moisture may linger and lead to mould issues if not addressed.
A completely dry surface looks better and prepares the tiles for sealing, should you apply a protective layer later. Ensuring the tiles are thoroughly dried is a crucial step in maintaining your red quarry tiles’ longevity and aesthetic appeal.
The significance of selecting the right cleaner for cleaning red quarry tiles cannot be overstated. pH-neutral cleaners are ideal, as they effectively remove dirt without damaging the tile surface or grout. It’s essential to avoid acidic or alkaline cleaners, which could strip the natural finish of the quarry tiles.
Research various products on the market, reading reviews and recommendations to find a cleaner that meets your needs. For those who prefer a natural approach, consider creating a solution of vinegar and water as a gentle cleaner, but be cautious with the concentration to prevent any adverse effects on the tiles.
Another critical factor to consider is the grime you’re dealing with. For instance, if there are heavy grease stains, a targeted degreaser may be necessary. In contrast, routine maintenance can typically be handled with a simple pH-neutral solution. By carefully selecting your cleaning agent, you ensure a thorough clean and the preservation of your red quarry tiles’ integrity.
After choosing your cleaning solution, the next step in cleaning red quarry tiles is applying it. Use a mop or brush to spread the cleaning solution evenly across the tiles, ensuring comprehensive coverage in all areas. Working in sections, particularly in larger spaces, is advisable to maintain control and ensure thorough cleaning.
When applying the solution, follow the manufacturer’s instructions, especially regarding the recommended amount to use and the dwell time before rinsing. Allowing the solution to sit for the specified period enables it to penetrate and break down grime effectively. The dwell time may vary with different cleaners, so adherence to the instructions is crucial for optimal results.
As you apply the solution, pay attention to any areas needing extra attention. For instance, consider using a more concentrated cleaner there if there are filthy spots. By being attentive during this step, you enhance the overall effectiveness of your cleaning process and ensure a thorough clean.
Dwell time might seem like a minor detail in your cleaning routine for red quarry tiles, but it is a critical stage that should not be overlooked. After applying the cleaning solution, it is essential to allow it to sit on the tiles for the recommended duration. This waiting period permits the cleaner to effectively loosen dirt and stains embedded in the tile surface and grout lines.
Timing can vary depending on the cleaner used, but generally, a five- to ten-minute dwell time is sufficient for most pH-neutral solutions. During this time, the cleaning agents penetrate the grime, breaking it down and facilitating easier removal during the scrubbing phase. As you await the dwell time, it’s a good opportunity to prepare your scrubbing tools and any additional cleaning agents that may be necessary.
This patience during the cleaning process pays dividends, as it dramatically enhances the efficacy of the scrubbing phase. Without adequate dwell time, dirt may remain lodged within the tile surface, necessitating more effort to achieve the desired level of cleanliness.
A stiff brush is an indispensable tool for successfully eliminating stubborn stains and grime from your red quarry tiles. Scrub the tiles vigorously with your chosen cleaning solution, applying firm pressure to lift away dirt and debris effectively.
A stiff-bristled brush is particularly adept at tackling deeply embedded stains that a mop alone cannot manage. Focus on small sections at a time, working in circular motions to maximise your cleaning potential. This method increases your cleaning efficiency and helps ensure that no spots are missed during the scrubbing process.
As you scrub, pay particular attention to the grout lines, as these areas often accumulate dirt and require extra attention. Ensure your brushing technique is thorough yet gentle enough to avoid scratching the tiles. Regularly inspect the bristles for dirt build-up, rinsing them out frequently to prevent reintroducing grime during scrubbing.
A strong, meticulous approach to scrubbing can significantly transform the appearance of your tiles, restoring their original vibrancy and charm.
As you learn how to clean red quarry tiles, it’s crucial not to underestimate the importance of focusing on grout lines. These areas often collect grime and can appear discoloured, detracting from the overall aesthetic of your tiled surfaces. To tackle this challenge, use a stiff brush or an old toothbrush to scrub the grout effectively.
Applying a little extra cleaning solution directly to the grout can yield significantly better results. Allow it to dwell briefly before scrubbing to help loosen any stubborn dirt. Pay special attention to areas that appear darker or more soiled than others, as these often indicate a build-up requiring intensive cleaning.
Working in manageable sections ensures that you don’t miss any spots. Remember to rinse the brush frequently to prevent dirt from being redistributed onto cleaned areas. If you find the grout remains stained after your efforts, consider using a dedicated grout cleaner for more persistent issues, but always perform a spot test first to avoid any damage.
A clean and well-maintained grout line elevates the aesthetic appeal of your red quarry tiles and enhances their longevity by preventing further staining and damage.
As you scrub the tiles during the process of cleaning red quarry tiles, regularly rinsing your brush is imperative. This simple action prevents the accumulation of dirt and grime on your brush, which can be transferred back onto the tiles you’ve just cleaned. By rinsing frequently, you ensure a more effective and thorough cleaning process.
To rinse your brush, dip it in a bucket of clean water, ensuring you remove any debris or residue that has built up during scrubbing. Shake off any excess water and continue with your cleaning. This practice not only enhances the efficiency of your efforts but also contributes to achieving a cleaner final result.
Additionally, consider having multiple brushes available, especially when cleaning large areas. This allows you to alternate between brushes while one is being rinsed or dried, making the entire process smoother and more efficient. It ultimately saves you valuable time while ensuring your red quarry tiles receive the best care possible.
Once you’ve thoroughly scrubbed the tiles, applying a suitable cleaning solution remains crucial in cleaning red quarry tiles. This step involves using the same or a different cleaning solution to treat areas that may still show signs of stubborn dirt or stains.
Generously dab the solution onto particularly troublesome spots, allowing it to dwell for a few minutes before scrubbing. Letting the solution penetrate the grime is essential, as it enhances the overall effectiveness of the scrubbing you will follow.
Combining scrubbing with a second application of cleaning solution can yield remarkable results. By carefully treating each area, you enhance the likelihood of restoring your tiles to their original splendour. A more comprehensive approach ensures that no dirt is left behind, providing your red quarry tiles with the deep clean they deserve.
Following the scrubbing phase, the next step in cleaning red quarry tiles involves a thorough rinsing of the surface. This phase is critical as it removes any traces of cleaning solution, dirt, and grime. Begin by preparing a clean bucket of water and utilise a mop or cloth to rinse the tiles systematically.
Work in manageable sections, ensuring that you rinse away all residues. Neglecting this step could result in streaking or a lacklustre finish on your tiles. Remember, the effectiveness of your cleaning process hinges on this step; all cleaners and residual dirt must be eliminated for optimal results.
As you rinse, observe the tiles closely to ensure that any remaining stains or residues are also being addressed. If necessary, revisit any problem areas with a cloth or a clean mop to catch missed spots. A well-rinsed surface appears pristine and prepares the tiles for sealing, should you decide to apply a protective layer later.
After rinsing, it’s essential to dry the surface of your red quarry tiles thoroughly. This step is vital for cleaning red quarry tiles, as it prevents water spots and potential damage to grout lines, which can occur if moisture is allowed to linger. Use clean towels or a squeegee to swiftly and efficiently remove excess water.
When using towels, opt for absorbent microfiber cloths that absorb water without leaving lint or residue behind. If you prefer a squeegee, ensure it’s clean to avoid redistributing dirt. Work systematically across the area as you dry to ensure no spots are overlooked.
Once dried, inspect the tiles. A thorough drying process enhances the appearance and sets a solid foundation for future sealing. It’s a key step in maintaining the vibrancy and longevity of your red quarry tiles.
Ensure that your red quarry tiles are completely dry after the drying process to prevent mould and mildew growth. This is especially important in areas with high humidity or poor ventilation, such as bathrooms and kitchens. Facilitate air circulation by opening windows or using a fan to aid in the drying process.
Perform a final check on the tiles, particularly around grout lines, where moisture may linger. If you discover any damp areas, take additional measures to dry them thoroughly. This attention to detail prevents future cleaning challenges and maintains the overall health and appearance of your tiling.
An arid surface looks appealing and ensures the longevity of your red quarry tiles. Dedicating time to dry them properly is an investment in the beauty and durability of your flooring.
Before concluding your cleaning job, performing a final inspection of your red quarry tiles is an essential step in cleaning them. This thorough check will help you identify any remaining residue, stains, or spots that may have been overlooked during the cleaning process.
Walk through the area, inspecting each tile closely. Don’t hesitate to get down on your hands and knees for a more detailed view. Look for areas needing a quick touch-up, whether additional scrubbing or spot cleaning.
If everything meets your standards, you can take pride in the successful restoration of your tiles. However, if you notice any imperfections, address them immediately. It’s better to tackle any issues now than to let them linger, ensuring that your red quarry tiles shine brightly and reflect your efforts in their care.
Once your red quarry tiles are clean and dry, the next step in cleaning them is to consider sealing them. A high-quality sealer provides a protective barrier against future stains, dirt, and moisture, prolonging the life of your tiles. When selecting a sealer, look for one specifically designed for quarry tiles, as these will offer optimal performance.
Assess the foot traffic the area receives; high-traffic zones may require a more robust, durable sealer. For natural clay tiles like red quarry, a penetrating sealer is recommended, as it soaks into the pores of the tile and grout, enhancing their longevity while allowing them to breathe effectively.
Before application, read reviews and seek professional recommendations to ensure you’re making an informed choice. A well-chosen sealer not only safeguards your tiles but also maintains their pristine appearance for years.
When it comes to applying the sealer in your process of cleaning red quarry tiles, precision is paramount. Begin by ensuring that the tiles are completely dry; any moisture can hinder the effectiveness of the sealer. Use a clean brush or roller to apply the sealer evenly across the tile surface, ensuring complete coverage.
Work in small sections, applying the sealer liberally but avoiding puddles, which can lead to uneven protection. Adhere to the manufacturer’s instructions regarding application techniques and drying times. Typically, two coats are recommended for optimal protection; allow adequate drying time between layers for the best results.
As you apply the sealer, be cautious to avoid spilling on adjacent surfaces. A well-executed sealing process enhances the tiles’ visual appeal while providing a robust shield against stains and moisture, ensuring that your cleaning efforts have not been in vain.
After applying the sealer, the final step in cleaning red quarry tiles is allowing it to dry and cure properly. This crucial process determines the effectiveness of the sealing job. Follow the manufacturer’s guidelines for drying times, which may vary depending on the product used and environmental conditions.
While curing, it’s best to keep the area well-ventilated but avoid direct water exposure for at least 24 hours, as this could compromise the integrity of the seal. Once cured, your tiles will possess a protective barrier that resists stains and moisture, simplifying future cleaning efforts.
During the drying and curing phase, avoid prematurely placing any furniture or rugs back onto the tiles. Exercising patience during this phase will pay off, ensuring a flawless finish and long-lasting protection that keeps your red quarry tiles looking stunning for years.
Establishing a regular cleaning routine is essential to maintaining the beauty and integrity of your red quarry tiles. Consistent upkeep can prevent the buildup of dirt and grime, making deep cleaning sessions less frequent and more manageable. Aim to sweep or vacuum the tiles at least once a week, removing loose debris and dust to maintain their appearance.
In addition to sweeping, consider damp mopping the tiles every few weeks with a pH-neutral cleaner to preserve their shine. This routine not only keeps your tiles looking fresh but also extends the lifespan of the grout and prevents unsightly staining.
Be sure to adapt your cleaning frequency based on the level of foot traffic the area receives. High-traffic zones may require more frequent cleaning to combat dirt accumulation and wear. Implementing a consistent cleaning routine protects your investment and ensures your red quarry tiles remain in prime condition.
When cleaning your red quarry tiles, avoiding harsh chemicals is crucial in preserving their integrity. Many conventional cleaning products contain acids or alkaline substances that can damage tile surfaces and grout over time. Instead, opt for gentle, pH-neutral cleaning solutions designed for tile maintenance.
It’s also wise to avoid abrasive scrubbers that can scratch the surface. Instead, use soft brushes or cloths that effectively clean without causing harm. This careful approach not only protects the tiles’ natural finish but also diminishes the need for more intensive cleaning later on.
By choosing milder products, you safeguard both your tiles and the environment, ensuring that your cleaning practices are as sustainable as they are effective. A mindful cleaning strategy can significantly extend the life of your red quarry tiles, preserving their beauty for years to come.
Addressing spills and stains promptly is essential for maintaining the integrity of your red quarry tiles. When spilling a liquid, quickly blot the area with a clean cloth to absorb as much of the substance as possible. Avoid scrubbing at this stage, as this can drive the stain deeper into the tile or grout, causing lasting damage.
For stubborn stains that have set in, apply a gentle cleaning solution or a paste made from baking soda and water. Allow it to sit briefly before gently scrubbing with a soft brush. This immediate attention can prevent permanent staining and keep your tiles looking their best.
Consider placing mats or rugs strategically in high-use areas to catch spills before they reach the tiles. By being proactive and treating stains immediately, you can significantly reduce the risk of damage, ensuring your red quarry tiles maintain their charm and elegance for the long term.
Red quarry tiles are typically made from natural clay fired at high temperatures, yielding a durable and visually appealing flooring option.
While vinegar is a natural cleaner, it is acidic and can damage the finish of red quarry tiles. Instead, it is advisable to use a pH-neutral cleaner specifically designed for tile care.
It is generally recommended that red quarry tiles be sealed every 1-3 years, depending on usage and foot traffic, to maintain protection against stains and moisture damage.
Steam cleaning can be effective, but should be used cautiously. Excessive moisture can damage grout; consult the tile manufacturer’s guidelines before proceeding.
For persistent stains, consider using a dedicated stain remover formulated explicitly for tile surfaces, or consult a professional tile cleaner who can assess the situation and provide expert advice.
Bleach is not recommended for cleaning red quarry tiles, as it can discolour the grout and damage the tile surface, leading to further maintenance issues.
Regularly sealing your grout and promptly addressing spills can help prevent discolouration, maintaining its appearance over time.
Using clean, dry towels or a squeegee is highly effective for drying red quarry tiles, ensuring that no moisture remains that could lead to mould or damage.
Mixing cleaning products is generally not advisable, as this can create harmful reactions or reduce their effectiveness. Stick to one type at a time for the best results.
While red quarry tiles are durable, they require regular cleaning, sealing, and immediate stain treatment to keep them looking their best and prolong their lifespan.