

13 August 2024 by
sitemanager
Mastering marble polishing techniques has enabled technicians to preserve marble’s timeless beauty and luxury, enhancing homes and public spaces for centuries. Polishing marble keeps it beautiful and extends its finish. Though complex, it enhances beauty and lifespan, making it a wise investment.
Before polishing, it is essential to understand marble. Marble is a metamorphic rock formed from limestone under intense heat and pressure. Marble is mostly calcite. It has some quartz and iron oxides. These minerals give it different colours and patterns.
Marble type dictates the choice of polishing techniques. For example:
Each type of marble has unique features that affect how it should be polished and cared for.
Marble polishing is a multi-step process that requires attention to detail and the right materials. The first stage, preparation, is crucial for ensuring the surface is ready for polishing. It involves a thorough cleaning to remove dust, dirt, and debris. A pH-neutral cleaner is typically used, as it won’t damage the stone. Any cracks or chips in the marble are repaired using epoxy or resin to create a smooth, even surface.
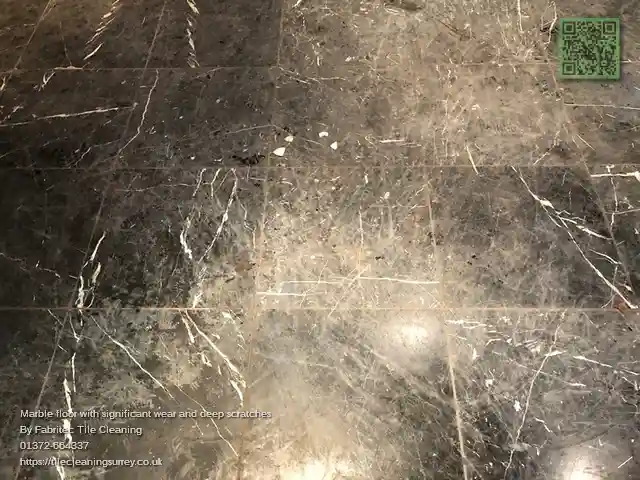
 Grinding: after preparation, if the floor shows significant wear, deep scratches, damage, or uneven tiles, the surface requires grinding, shifting the process from polishing to restoration. This step involves removing millimetres of stone using heavy-duty, aggressive diamond tools to remove the damaged and uneven areas, creating a smooth, uniform surface.
Honing is the next essential step, removing light surface scratches or grinding marks. This process uses finer diamond pads or honing powders to bring the stone to a satin-like finish, closer to polished but without the high gloss.
The polishing stage is where the magic happens. We polish the marble with buffing pads and polishing powders, giving it a glossy, reflective finish. This step highlights the stone’s natural beauty, colour, and veining.
Finally, we apply a penetrating or impregnating sealer to protect the polished marble from future stains and spills. Penetrating sealers protect stone without changing its look, keeping it beautiful for years.

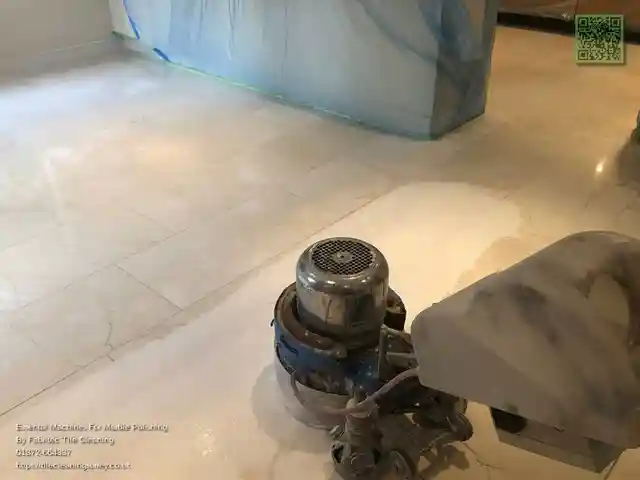
Effective marble polishing requires the right tools and materials. Polishing machines, whether hand-held or floor models have rotating pads. They provide the pressure and movement needed for polishing. Diamond pads, ranging from coarse to fine grits, are a must, depending on the stage of the polishing process. Also, specialised polishing compounds, in powders or pastes, work with marble’s natural properties. They enhance its shine without causing damage.
Marble polishing is a delicate balance of technique, experience, and attention to detail. From the initial grinding to the final buffing, each step requires precision to achieve a flawless finish. With expert use, the techniques below will keep marble surfaces at their best for years. We use these expert techniques to restore an old marble floor or polish a new one. They are essential for the highest standards of craftsmanship.
Grinding machines are essential for levelling marble surfaces and preparing them for polishing. These powerful machines work like large drills, requiring a skilled operator to avoid irreversible damage. A key technique is maintaining consistent, overlapping passes during grinding. This ensures even material removal across the surface and prevents grooves or low spots that create an uneven finish. Professionals work in a grid pattern and monitor the machine’s progress to ensure an even grind on the surface.
 2. The Art of Honing
Honing is the process of smoothing the marble after grinding but before polishing. It removes minor scratches and prepares the surface for the final polish. Though less aggressive than a grinder, the honing machine also demands precision. An expert knows that uneven pressure or movement can cause a patchy surface. This leads to an unsatisfactory, uneven polish. Honing uses finer grits of diamond abrasives. It gradually refines the marble’s surface to a uniform, satin-like finish.
Polishing powders bring out the final shine in marble surfaces. These powders are usually acidic compounds. They react with the marble when mixed with water and mixed into a polishing paste. This creates a smooth, glossy surface. Powder misuse damages marble, causing burns or etching. This dulls its appearance. Experts control paste consistency and allocate sufficient polishing time.
A consistent polish is the hallmark of expert craftsmanship. This means making precise, uniform passes over the marble with the polishers. Professionals know that a steady speed and consistent pressure are vital in polishing. This consistency avoids swirl marks and streaks. It creates a mirror-like finish, enhancing the marble’s natural veining and colour. Also, our skilled polishers will often switch polishing pads. They start with coarser ones and move to finer, softer pads to get the right shine.
After polishing, sealing the marble is crucial to protect it from stains and moisture. An expert understands that the sealant must be applied evenly and allowed to penetrate the stone fully. Once the sealant has cured, a final buffing with a soft, clean pad removes any application marks and enhances the marble’s gloss. This last step concerns aesthetics and longevity, as a well-buffed and sealed marble surface is more resistant to wear and tear.
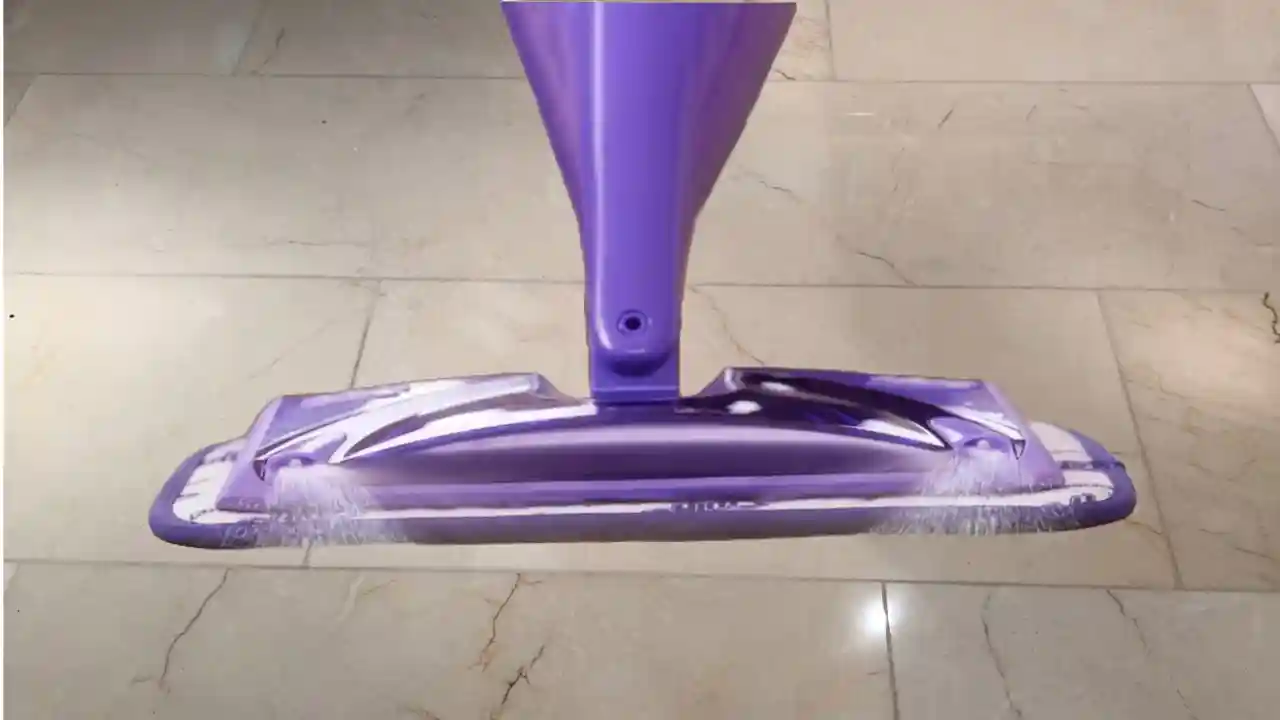
 Once polished, maintaining the marble’s shine requires regular care. Use microfibre mops and pH-neutral marble cleaners. They are essential to avoid damaging the surface. Avoid harsh chemicals that cause etching or dullness. Reapply a sealant every 6-12 months, depending on use. This will protect your marble and keep it looking its best.
Even with the best care, marble can encounter issues.
Etching occurs when acidic substances, like lemon juice or vinegar, touch marble, causing dull spots on the surface. Skilled technicians eliminate flaws with precision using customized polishing compounds. But first, test the polishing process on a hidden area or a sample tile. This will ensure the results meet your expectations and suit the marble type. This step helps to avoid damage and ensures a perfect finish.
To remove stains, use marble-specific stain removers or a poultice. The poultice draws out the stain before you re-polish the surface. Choosing a stain remover and poultice for polished marble is crucial. Some products may etch or damage the surface if they are not for this delicate material. If the marble looks dull over time, it needs some upkeep. An occasional re-polish will restore its shine.
Scratches: marble is a relatively soft stone, level 3 on the Mohs scale, so it is susceptible to scratches from foot traffic. That is why removing outdoor shoes and using entrance mats is important.
When polishing marble, we focus on safety and environmental considerations. Good ventilation is crucial when using chemical sealants or polishers. It prevents inhaling irritating fumes. Many marble polishing powders have fine acidic crystals. These can irritate the respiratory system, so we wear masks for protection. We choose eco-friendly products designed for safe handling. This choice helps the environment and keeps your marble surfaces safe.
Polishing marble restores its shine and keeps its natural beauty. Whether you do it yourself or hire a pro, know the process and materials. They are crucial for a lasting finish. With proper care, your marble will remain beautiful and timeless.
High-traffic marble floors need polishing every 1-2 years, while less-trodden areas can wait 3-5 years. Diligent upkeep, including cleaning and sealing, extends the interval between professional polishing. Tailor your schedule to your floor’s unique wear patterns. A well-maintained marble surface retains its lustre longer, balancing beauty with practicality. Adapt your care routine to match your floor’s specific needs and usage.
You can polish marble with the right tools, experience, and methods. But, for guaranteed results, hiring a professional is better. Our expertise and tools guarantee flawless results. We smooth, fix, and perfect surfaces with precision.
Honing uses abrasives to smooth surfaces and achieve a matte finish. In contrast, polishing uses finer abrasives and compounds for a high-gloss finish. Both are crucial for marble surface care.
After polishing, sealing the marble is crucial. It prevents stains, liquid damage, and other issues. A good sealer forms a barrier, keeping the marble’s beauty and durability.
For marble floors, use a pH-neutral, non-abrasive cleaner made for natural stone. Avoid acidic or abrasive cleaners; they can harm the marble. Regular microfiber mopping preserves gleaming floors and wards off wear. Consistent care keeps surfaces pristine.